 Tech With Tam
Save two versions of a practice project
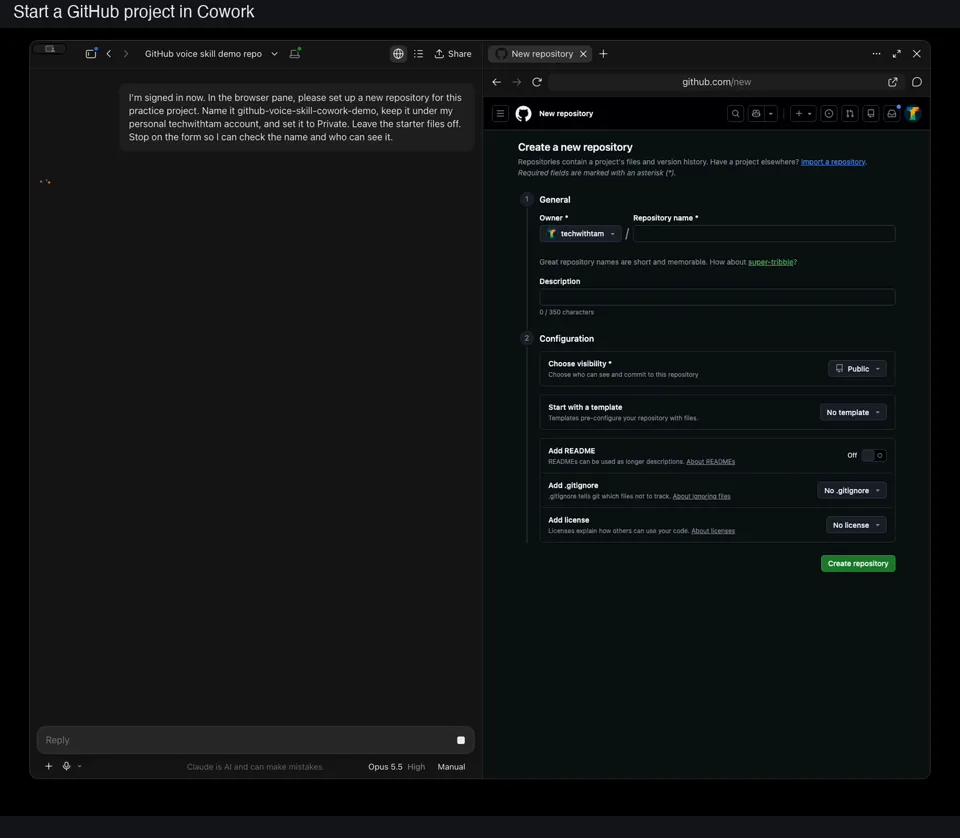
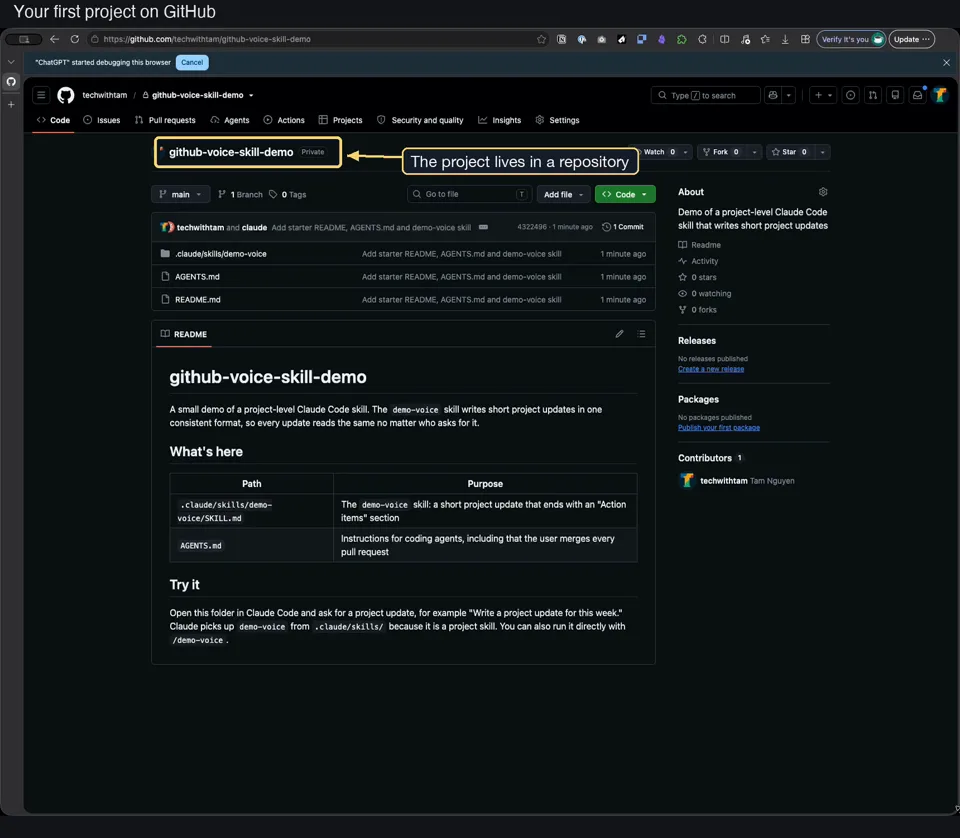
A repository, often called a repo, holds one project’s files and version history. The Cowork exercise uses a private repository and a one-line edit so you can see exactly how GitHub records a change.
- Create a free GitHub account(opens in a new tab) and sign in through Cowork’s browser. In Claude Desktop, open Customize, then Connectors. Use + to find GitHub and connect the account so Cowork can save files.
- Ask Cowork to fill out GitHub’s form for a new repository. Review the name and confirm that visibility is set to Private before asking Cowork to create it.
- Ask Cowork to write and save a README that describes the project. When Cowork requests permission, verify the repository name before selecting Allow once. Then ask it to add one sentence and save a second version.
- On the repository’s Code tab, click the commit count to open the history. A commit records a set of changes and saves a version of the project. Open the latest entry to see the line added in green, then open the earlier entry to review the original.
Reverse an edit in Claude Code
The walkthrough creates a private repository from an empty folder and saves a sample Claude skill. It then switches to an existing practice repository to demonstrate a change to the skill’s output. The example changes the heading from “Action items” to “Next steps,” then reverts the edit and runs the skill on the same input to confirm that the original heading is back.
Read the Claude Code transcript
Set up your own practice project
In Claude Desktop, choose Code and This computer, then open an empty folder. Paste the prompt into the chat. It asks Claude to guide you through sign-in and wait for your approval before sending the files to GitHub.
I’m new to GitHub. Can you help me make a private practice project on my GitHub account called voice-skill-code-practice?

In this folder, make a sample Claude skill that turns a rough note into a short project update with an “Action items” heading. Write a short README that explains what the skill does and gives me an example to try. Add a short AGENTS.md with one rule for AI tools: show me changes before sending them to GitHub.

Show me the files first and wait for me to say they’re ready. Then save the first version, put it on GitHub, and give me the link. If I need to sign in or approve something along the way, tell me what to click, one step at a time.
Branches, worktrees, and pull requests
A branch separates a change from the current version
A branch is a named line of work in a repository, with its own history of changes. main is a common name for the branch that holds the current version. In the video, we create a separate branch to try “Next steps” so we can save and test that edit while main still says “Action items.”
A worktree lets you keep two branches open
You can switch branches in the same folder. If you want both open at once, a linked worktree gives you another folder on your computer for the same repository. In the video, one folder has main open and the second has the branch with “Next steps.” Each folder shows the files from its own branch, and both folders share the same repository history.
A pull request puts the change up for review
A pull request, or PR, is a proposal on GitHub to bring changes from one branch into another. It shows the files and lines that changed and gives reviewers a place to comment. When you merge the pull request, the changes become part of the receiving branch.
Solo and team workflows
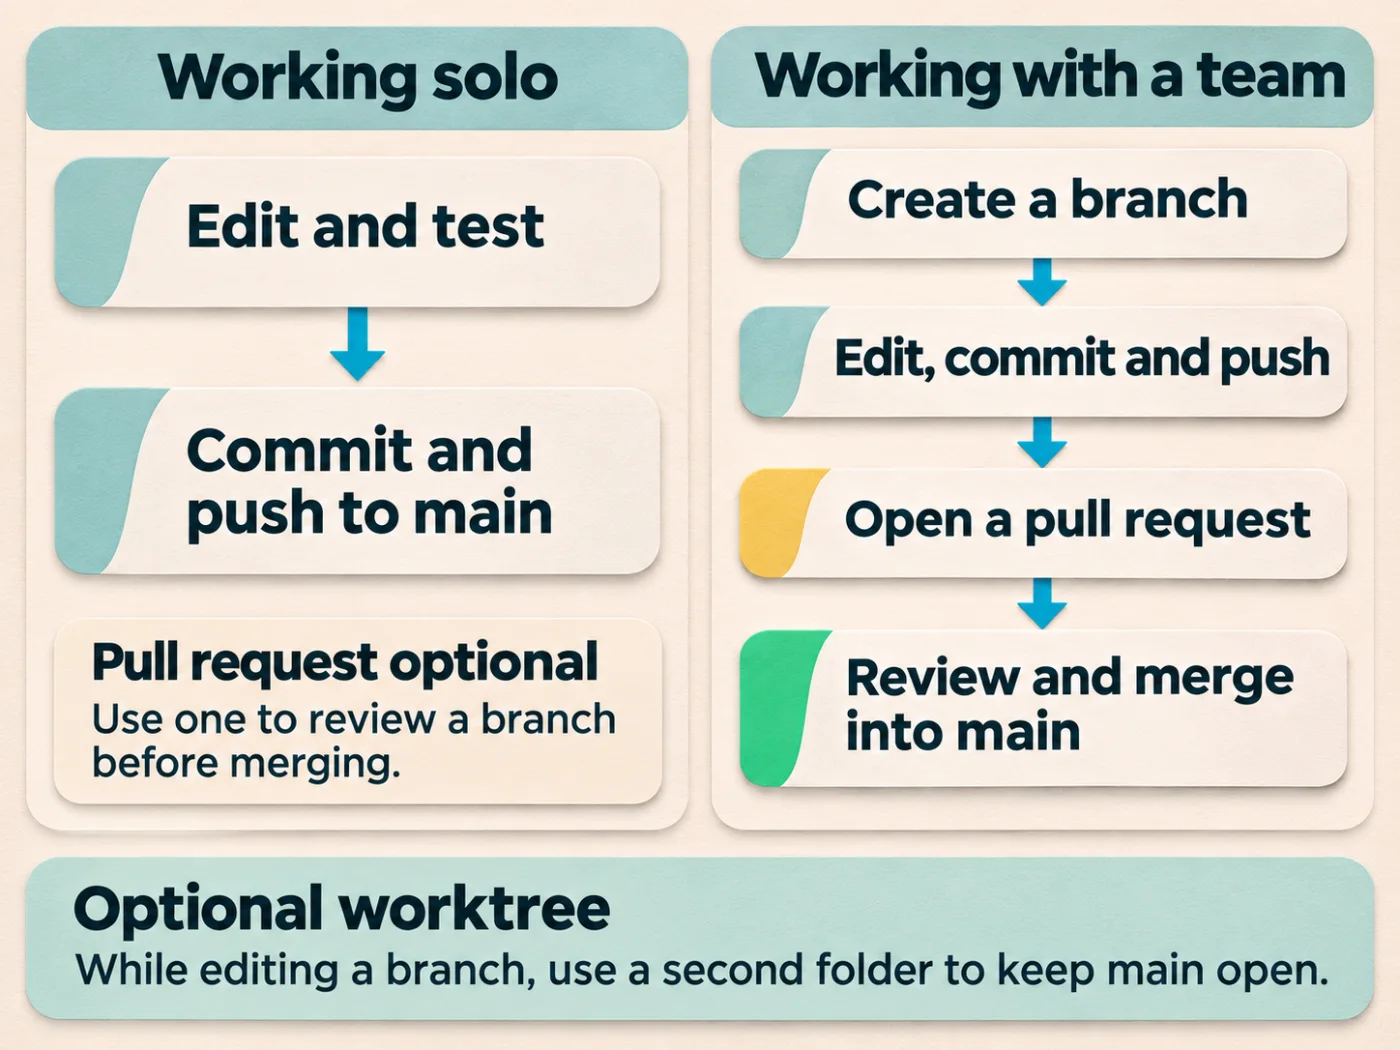
The solo path applies when your repository allows direct updates to main. View the diagram at full size
Working solo
For a small edit to a personal tool, the direct path above is often enough. Use a separate branch when you want to try an experiment before it reaches the version you rely on. If you're changing several skill instructions at once, a pull request lets you review the full set of edits and record why you made them before you merge.
Working with a team
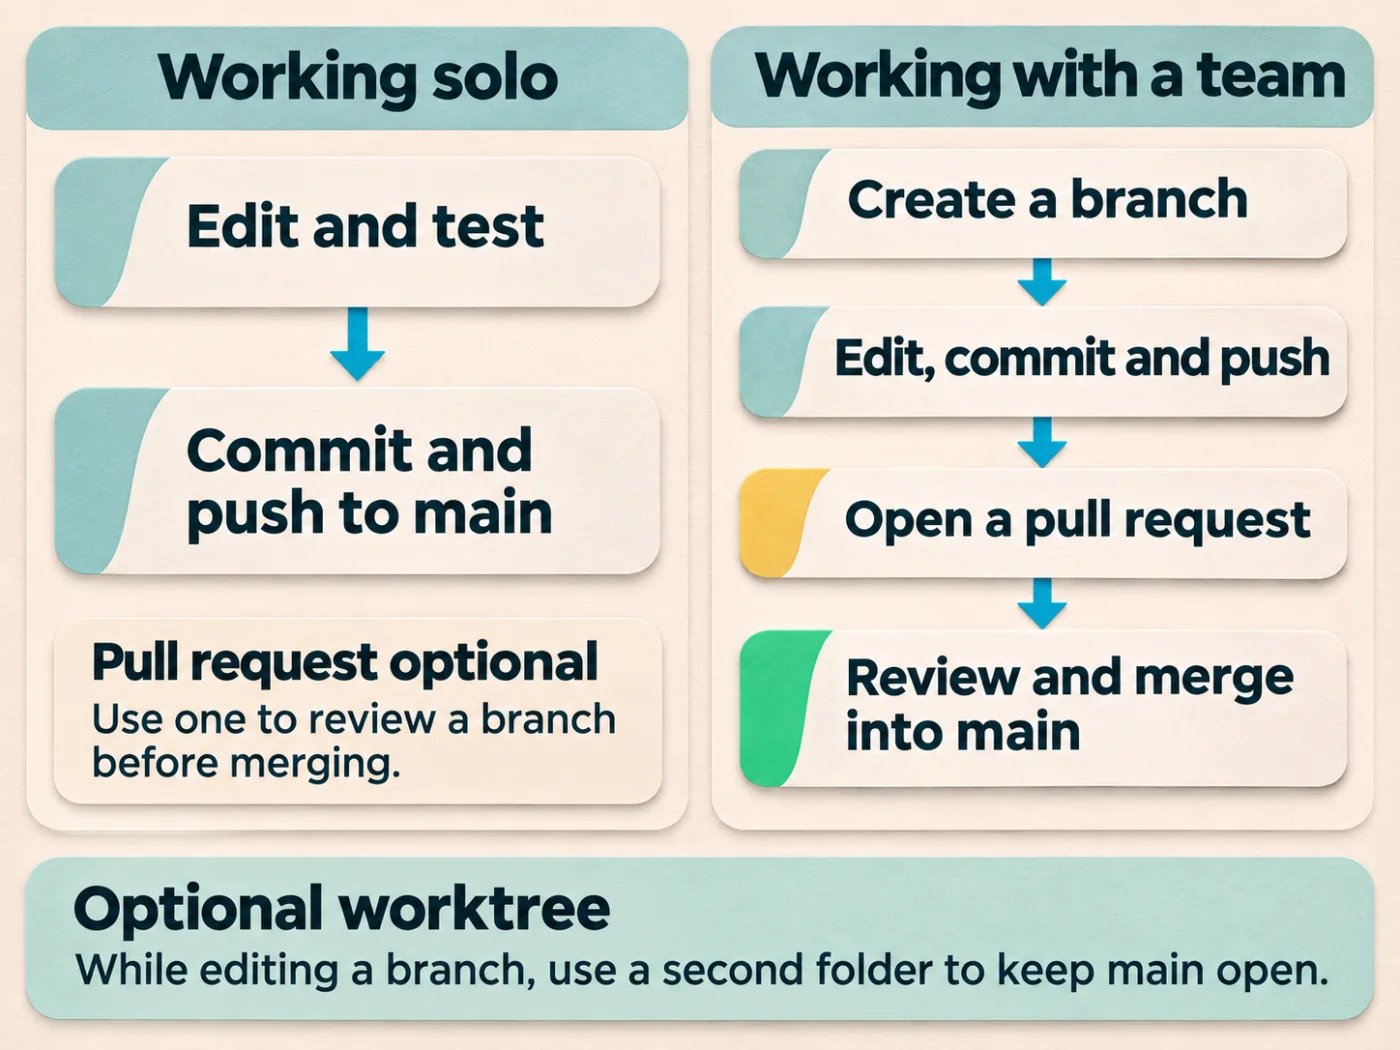
When other people rely on main, a pull request gives them a chance to review a change before it reaches the shared version. Teams can also require reviews or automated checks before GitHub allows a merge.
- Create a branch from
main. Give it a name that describes the change. You can use a worktree if you'd like to keep the original folder open while you work. - Commit and push. Make and test your edit. Commit it on your branch, then push the branch to GitHub so teammates can see it.
- Open a pull request. Describe what changed, why, and how you tested it. Ask a teammate to review it.
- Review and merge. Address feedback and complete any required checks or approvals. Merge into
mainwhen the change is ready.
Git terms used in the walkthrough
- Stage means to select the changes for the next commit.
- Push sends commits from your computer to GitHub. Pull brings updates from GitHub into your local repository.
- Revert creates a new commit that reverses an earlier change and preserves both entries in the history.